

A capping problem rarely starts with a dramatic machine failure. More often, a line that has been producing acceptable bottles begins to show a few loose closures, one cap sitting high on one side, or packages that suddenly need much more force to open. Because the defect becomes visible at the end of the closing process, torque is often the first setting people want to change.
That is not always where the problem started. An automatic capping machine still depends on stable cap presentation, bottle control, thread engagement, head contact, and consistent bottles and closures before final tightening can be judged correctly. The useful question is therefore not simply whether torque is high or low, but where the defect first appears and what the defect follows.
This article is about production troubleshooting. It is intended for a bottle-cap combination that has already run acceptably and later develops loose, crooked, cross-threaded, or difficult-to-open caps.
If you are setting up a new format, establishing the first stable settings, or completing a changeover, use the Automatic Capping Machine Setup guide. If you are comparing screw caps with pumps, triggers, or other closure families, see the closure-type setup guide.
Loose, Crooked and Overtightened Caps Do Not Point to the Same Cause
Imagine a line that has run normally for most of a shift. A few bottles reach inspection with caps that can still turn by hand, so the tightening setting is increased. The next samples include one closure that is difficult to open and another sitting visibly at an angle. That mixed result is useful evidence: the line does not have one simple “low torque” problem.
A screw cap must arrive in a repeatable position, meet a centered bottle neck, begin on the correct thread path, remain stable while the cap turns, and reach its intended seated position. A failure at any earlier point can change the final opening force or cap height. Final tightness is therefore the result of the whole closing sequence, not a diagnosis by itself.
This is why the visible defect should guide the first investigation. A loose closure may mean insufficient effective tightening, but it can also come from cap slip, bottle rotation, or incomplete seating. A crooked cap moves attention upstream toward placement and thread start. A difficult-to-open cap may be truly overtightened, but thread binding, liner behavior, or packaging variation can create a very similar result.
| Observed Pattern | What It Suggests First | Useful Evidence |
|---|---|---|
| Loose caps appear across several capping positions | Shared grip, bottle holding, seating, cap supply, or package variation | Accepted vs defective packages, bottle movement, cap slip, bottle/cap lot |
| Crooked and cross-threaded caps | Cap presentation, bottle centering, or first thread contact | Close video of placement, cap angle, bottle neck and thread marks |
| One capping position repeatedly produces rejects | Local head contact, alignment, wear, movement, or release behavior | Samples linked to head position under the same package condition |
| Failures begin after a bottle or cap lot change | Package dimensions, thread condition, liner, molding, or surface behavior | Old lot vs new lot under the same recorded machine condition |
| Loose and very tight caps appear in the same run | Head-to-head inconsistency, grip variation, or package variation rather than one common torque value | Defect type mapped against machine position and component lot |
The table is not a replacement for observation. Its purpose is to keep the investigation connected to a physical pattern. If the defect follows one head, investigate that head before disturbing positions that already work. If it follows a new cap lot across several positions, the component change deserves attention before a machine-wide correction.
Loose Caps: When More Torque Is Not the Answer
Loose caps create immediate production pressure because the bottle can look complete while the closure has not reached a stable final condition. Increasing the tightening setting may help when the real problem is genuinely insufficient effective tightening. It does not help when the intended movement never reaches the cap.
When the head rotates but the cap does not
A rotating capping head can make the station look normal even while the cap slips under it. Watch the closure itself. Smooth rotation, hesitation, slipping, rising, or stopping before a consistent final height tells more than the movement of the head alone.
Contact surfaces also matter. Residue, uneven wear, moisture, or contamination can change grip. Product around the bottle neck or closure surface may alter friction enough that a setup which worked on dry samples becomes inconsistent during production.
When the bottle moves with the cap
Even good cap contact cannot create repeatable tightening if the bottle rotates, rocks, lifts, or shifts sideways while the closure is being tightened. The effect can be intermittent because some bottle shapes, surface conditions, or dimensional combinations are easier to hold than others.
This is one reason a brief setup check may look acceptable while a longer production run begins to show loose closures. The setting has not necessarily changed; the package may simply be exposing a weakness in bottle control.
When the cap never reached full seating
A closure can also feel loose because it entered the thread incorrectly and stopped before its normal seated position. This becomes especially important when loose and crooked caps appear during the same production period.
Remove suspect samples carefully. Unusual abrasion, damaged thread marks, or evidence that the cap started on the wrong thread path can explain why increasing tightening force did not solve the problem. More force can destroy those clues and create a second defect on top of the first.
When one capping position behaves differently
Multi-head equipment should not be judged only by one overall reject percentage. If one position repeatedly produces loose caps while neighboring positions remain stable, a local head condition deserves attention before a common setting is changed.
The comparison is especially useful on a high speed rotary capping machine, where several closing positions operate continuously under the same production conditions. A defect that consistently follows one position points in a different direction from a defect spread evenly across the turret.
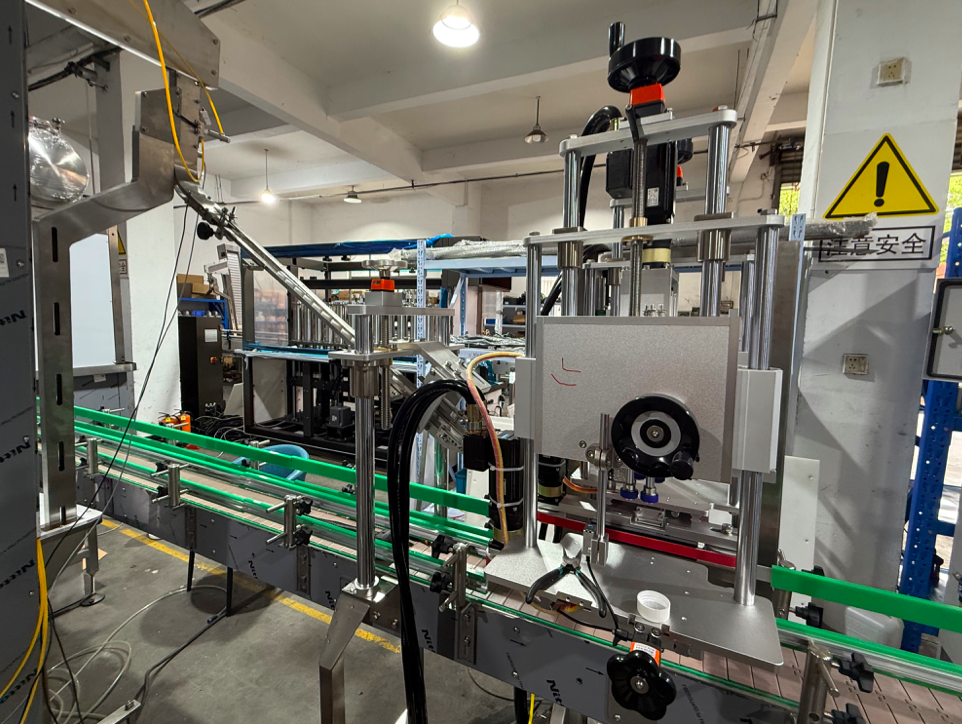
On a multi-position rotary capper, linking each reject to a specific capping position helps separate a local head problem from a shared bottle, cap, feeding, or setup condition.
Crooked and Cross-Threaded Caps Usually Start Upstream
A crooked closure usually gives a clearer clue than a loose one. By the time the cap is visibly tilted at discharge, the process has often gone wrong before final tightening. The most useful observation point is where the closure leaves the delivery path, reaches the bottle, and makes its first contact with the neck finish.
A cap does not need to be dramatically misaligned. One edge can touch slightly before the opposite edge. Rotation then begins from an uneven position, the thread follows the wrong path, and resistance rises before the cap reaches normal seating height.
At normal machine speed, this first contact can be difficult to see. A short close-range video often provides more useful evidence than repeatedly inspecting finished bottles after the defect has already happened. The important detail is whether the cap was already tilted before meaningful tightening began.
Cap supply can be stable while cap presentation is not
A feeder can deliver enough closures and still present some of them poorly. A cap may catch briefly, arrive late, change angle, or move sideways at the transfer point. Continuous supply is therefore not the same as repeatable orientation, spacing, timing, and placement.
Bottle centering matters at exactly the same moment. Guides may appear acceptable while still allowing certain containers to lean or shift. Bottle-neck geometry can also vary relative to the body, which means one bottle-cap combination may approach the thread differently even though the guide settings have not moved.
Cross-threading is evidence of incorrect engagement, but it is not the root cause by itself. The original reason may be cap angle, bottle centering, damaged threads, unstable initial pressure, or package variation. Preserving the cap and bottle before forcing them farther together makes those possibilities easier to separate.
A crooked cap deserves attention before the torque setting when:
- the tilt is already visible before the cap begins meaningful rotation;
- the closure bounces or shifts during transfer;
- the bottle and cap centerlines do not stay aligned;
- thread marks show early binding or an incorrect start;
- the defect becomes more common with a particular bottle or cap lot.
A Difficult-to-Open Cap Is Not Always an Overtightened Cap
A closure that suddenly needs much more opening force naturally raises suspicion about the tightening setting. That suspicion is reasonable, but it should be checked against the last accepted production condition before the whole machine is adjusted.
An unchanged recipe does not guarantee an unchanged mechanical result. The cap lot may have changed. Bottle-neck behavior may be different. A capping head may have been cleaned, serviced, or replaced. Product residue may change friction. A liner or tamper feature can also alter opening feel even when the tightening input itself is not unusually high.
Compare the suspect bottle with the last accepted condition
If only one capping position produces difficult-to-open closures, lowering a shared setting can disturb every position that is already working. Compare the suspect station with another head under the same bottle and cap condition, then retain several samples linked to each position.
After the closure is removed, inspect more than the opening force. Thread scuffing, deformation, liner contact, and tamper-feature behavior can help distinguish true over-tightening from mechanical binding. A misaligned cap can feel extremely tight because damaged threads are forcing against one another, not because the final tightening setting was excessive.
Is the Problem in the Machine or in the Bottle-Cap Combination?
This question matters because the machine is the easiest part of the process to adjust, but it is not the only part that changed. The capper, bottle, and closure operate as one mechanical system. A shift in any one of them can change how the cap sits, grips, rotates, and releases.
Machine-side causes become more likely when the defect follows a repeatable location or event. One head produces the same problem while the others remain stable. A defect begins immediately after a format change. Bottle guides, holders, or change parts were adjusted before the first reject appeared. Repeatability is the clue.
Packaging variation becomes more likely when the defect is scattered across several positions but changes noticeably with a new bottle or cap lot. Visible thread differences, liner position, molding condition, or bottle-neck geometry strengthen that suspicion. The two can also interact: a machine may run most approved components reliably but struggle when a particular bottle-cap combination sits near the edge of its usable tolerance.
A useful comparison does not need a complicated worksheet.
Keep the machine condition stable and compare:
- accepted and defective packages from the same production period;
- the suspect head and at least one stable head;
- the previous bottle or cap lot and the current lot where available;
- the same package before and after one controlled machine change.
What should be avoided is changing packaging and machine variables together. If a new cap lot is introduced while guide position and tightening settings are changed at the same time, an improved result does not reveal which change actually corrected the problem.
Start With the Last Good Bottle, Not the Control Panel
The fastest-looking troubleshooting method is often the least informative: change a setting, run a few bottles, change another setting, and stop when several samples look acceptable. The problem is that each change removes part of the original evidence.
A better starting point is the last accepted condition. Keep a good bottle from the same production period if possible, then compare it with loose, crooked, cross-threaded, and difficult-to-open samples before anything is disassembled. Record the active setup reference, bottle and cap lot, capping position, approximate defect proportion, and the time the issue began. This is enough to preserve a baseline without turning the article into a paperwork exercise.
The defective bottle is evidence
An assembled crooked closure shows seating angle and final height immediately. Once it is removed, part of that evidence disappears. Keep some defective assemblies intact, photograph the cap-to-neck relationship, and use additional samples for thread and liner inspection.
Use consistent views rather than many random images. A front view, top view, cap-to-neck interface, and thread view after removal make before-and-after comparisons much more useful. If the defect is intermittent, short process video is often more valuable than another finished-bottle photo because it can show cap bounce, bottle movement, head slip, or the exact moment the thread begins incorrectly.
One change should answer one question
Once the evidence is preserved, change one meaningful factor and compare the result against the baseline. If the suspected cause is bottle rotation, correct or test bottle holding without also changing the cap lot and tightening setting. If one head is suspected, compare that position with another before making a global correction.
The first good bottle after an adjustment is not proof that the problem is solved. A useful correction should remain effective across representative packages and relevant capping positions. Record actual defect counts rather than descriptions such as “sometimes loose.” A change from loose caps to crooked caps is not an improvement if the underlying engagement problem is still present.
Mixed Defects Can Be More Informative Than a Single Reject
Real production problems rarely arrive in perfect categories. Loose, crooked, and difficult-to-open caps can appear in the same run, and the combination often narrows the investigation more effectively than one isolated reject.
Loose + crooked
Move placement and thread start higher on the list. A cap that begins at an angle can bind early, stop before full seating, and later appear loose. More tightening can make correctly engaged caps too tight while leaving the poorly engaged ones defective.
Loose + difficult to open
Compare head-to-head consistency and package lots. A wide spread under one common setup often means the process is not transferring the same mechanical result at every position or with every component.
Crooked + difficult to open
Inspect for thread binding before assuming excessive torque. A misaligned closure can generate heavy opening resistance because damaged threads are forcing against each other. Correcting placement may improve both symptoms at once.
When a Capping Defect Becomes an Equipment Decision
Not every recurring reject means the machine should be replaced or upgraded. If the defect follows one capping head, local service, alignment, contact condition, or calibration may be enough. If the pattern follows one cap or bottle lot, the next step is package validation rather than a different capper.
A broader equipment review becomes more reasonable when representative packages continue to expose the same limitation after cap presentation, bottle holding, thread engagement, individual capping positions, and controlled adjustments have been checked. Examples include repeated cap-presentation instability that the existing transfer arrangement cannot control, bottle rotation that the current holding system cannot stabilize, or closure behavior that remains highly sensitive across normal approved package variation.
At that point the question changes from “Which setting should move?” to “Can the current configuration control this bottle-cap combination consistently?” That decision should be based on real bottles, caps, reject samples, and process evidence rather than a catalog description alone.
Match the next action to what the defect follows
- One head: inspect or service that position before changing the whole machine.
- One bottle or cap lot: compare component condition and tolerance before changing equipment.
- Shared bottle rotation: review holding and container control.
- Repeated placement instability: review cap feeding, transfer, and presentation.
- Persistent configuration limitation: compare a different capping configuration with representative samples.
For projects where multi-position continuous capping is relevant, you can review the rotary capping machine range and the high speed rotary capping machine category after the defect mechanism has been identified.
Turn the Defect Into a Testable Case
A useful technical review should begin with evidence, not with a request for a generic torque value. The more clearly the defect is linked to a package, capping position, lot, or moment in the closing sequence, the easier it is to decide whether the next step is adjustment, service, package validation, or equipment review.
Before sending a troubleshooting case, prepare the information that changes the diagnosis:
- Samples: accepted, loose, crooked, cross-threaded, and suspected overtightened packages.
- Frequency: how many defects appear in the inspected quantity, not only “occasional” or “frequent.”
- Production context: current setup reference, bottle and cap lots, and capping position where known.
- Video: cap delivery, first contact, bottle movement, thread start, and tightening from a useful close angle.
- Reference package: the last accepted bottle or an accepted sample from the same run.
These materials allow the review to separate cap placement, thread engagement, bottle holding, capping-head condition, packaging variation, and tightening control before a machine or setup change is proposed.
| Submit Defect Samples & Test Data → | Review Capping Equipment → |
Frequently Asked Questions
Why does only one capping head produce loose caps?
A repeated defect at one position suggests a local condition such as head contact, grip, alignment, wear, movement, or release behavior. Compare samples from that position with samples from a stable head under the same bottle and cap condition before changing a setting shared by the whole machine.
How can I tell whether the defect comes from the machine or the cap lot?
Look for what the defect follows. A problem that repeats at one capping position points more strongly toward the machine side. A problem that appears across several positions after a cap-lot change points more strongly toward the component. Compare old and new lots under the same recorded machine condition whenever possible.
Should I change torque when loose and overtightened caps appear in the same run?
Not as the first move. A wide spread between loose and difficult-to-open closures can indicate head-to-head inconsistency, slipping contact, thread binding, or package variation. Map both defect types against capping position and bottle/cap lot before changing one common torque setting.
When does a recurring capping defect justify reviewing another machine configuration?
A broader equipment review makes sense after package condition, cap presentation, bottle holding, thread engagement, individual capping positions, and controlled adjustments have been checked and representative samples still expose the same limitation. The decision should be based on actual bottle-cap performance, not only on a target speed or a catalog specification.