

An automatic screw capping machine setup can look mechanically ready and still produce an unstable first production run. One bottle turns slightly inside the holding system, another cap reaches the neck at an angle, while the next package appears tight even though the thread started badly. For threaded closures, setup works best when bottle stability, cap placement, thread start, and final tightening are controlled in that order. The goal is not to discover one universal torque number. It is to create a package-specific setup that can be repeated when the line starts again, changes bottle or cap format, or returns to the same SKU later. If you are still comparing machine types rather than adjusting a known screw-cap process, start with the automatic capping machine category.
Setup focus:
stabilise the bottle first, observe how the screw cap reaches the neck and starts the thread, define how the finished package will be accepted, and only then adjust final tightening. More tightening force should not be used to hide bottle rotation, poor cap alignment, or an unstable thread start.
Start With the Bottle-Cap Package, Not a Torque Number
The fastest way to make a new screw-capping setup confusing is to begin at the tightening control. A capper does not work with an abstract cap diameter. It handles a particular threaded closure, neck finish, bottle wall, bottle shape, sealing requirement, and cap-feeding condition.
Two threaded closures can look almost identical on a workbench yet behave differently once production begins. One may settle cleanly onto the neck, while another stays high until the first rotation. Likewise, one bottle may remain rigid during tightening, while a lighter container twists or compresses before the closure reaches its final position.
Read the Package as a Mechanical System
Before adjusting the machine, place the real bottle and closure together and inspect the surfaces that will interact with the equipment. The bottle needs a practical holding area, the neck needs a predictable centreline, and the cap needs a stable surface for feeding and tightening.
Dimensions remain useful, but drawings do not show every handling characteristic. A specification sheet may not reveal how easily a thin sidewall bends, whether a ribbed cap rocks inside a guide, or whether the bottle base becomes unstable while travelling on the conveyor. Physical samples reveal those details much earlier.
Before changing machine settings, confirm:
- Bottle body shape, rigidity, base stability, and practical gripping area.
- Closure shape, thread condition, skirt geometry, and sealing features.
- Whether caps will be manually placed, dropped, or automatically fed.
- Whether finished closure orientation matters after tightening.
- Whether several bottle or closure formats must share the same capping equipment.
This inspection also stops component variation from being mistaken for poor machine adjustment. Damaged threads, distorted necks, inconsistent closures, or unstable bottle bases can all produce symptoms that look like capping errors.
Several representative parts are more valuable than one ideal sample. If a setting works only with a carefully selected bottle, the process is not yet dependable. A production setup should tolerate the normal package variation expected on the line.
Check Functional Surfaces, Not Only Nominal Size
Bottle width and cap diameter help establish basic compatibility, but functional contact surfaces often decide whether the setup is stable. The bottle body interacts with guides and holding components, while the closure may contact feeders, chutes, guides, placement components, and tightening wheels.
This distinction becomes important with irregular bottles. A package can fit comfortably through the available machine space yet provide only a narrow or flexible area for side holding. The correct question is not simply whether the bottle fits. It is whether the package remains controlled throughout cap placement and tightening.
Scope note: this guide focuses on establishing a repeatable setup for threaded screw-cap packages. If one line must also handle press caps, pumps, triggers, or other closure families, compare the additional feeding, tooling, placement, and change-part requirements in the bottle capping machine setup guide for different closure types.
Bottle Holding and Anti-Rotation Come Before Torque
Bottle holding becomes important the moment rotational force reaches the closure. On a stable setup, the cap rotates while the container follows a controlled path. On an unstable setup, the bottle may turn with the cap, lean against a guide, move sideways, or hesitate inside the holding area.
That movement changes the tightening result. If the bottle rotates, part of the intended mechanical action disappears through container motion. Increasing tightening force may appear to improve the package even though the real cause remains poor anti-rotation control.
Find a Holding Zone That Resists Motion Without Deforming the Bottle
A broad, relatively straight section of the bottle often provides the easiest contact area. Actual geometry still determines the best position. Recessed panels, curved shoulders, handles, labels, decorative surfaces, and thin sidewalls can all reduce the useful gripping zone.
During adjustment, the bottle itself provides useful feedback. If the sidewall visibly collapses under the holding system, additional pressure is unlikely to improve the process. At the opposite extreme, visible bottle rotation as tightening begins shows that the container still lacks sufficient restraint.
Practical observation:
a temporary reference mark on several test bottles makes unintended rotation easier to see. This does not replace formal package verification, but it gives a quick visual indication of whether the bottle is moving with the closure during tightening.
Rotation is only one type of unwanted movement. A tall bottle may lean, an unstable base may rock, and a poorly positioned guide may move the neck away from the intended centreline. Conveyor support, bottle spacing, guides, and side holding should therefore be assessed as one handling sequence.
For continuous friction-wheel tightening, bottle restraint and closure contact occur together. A four-wheel bottle capping machine is one relevant equipment direction when the package can be controlled by side holding and wheel contact. Final suitability still depends on actual bottle geometry, closure design, cap presentation, required output, and representative sample behaviour.
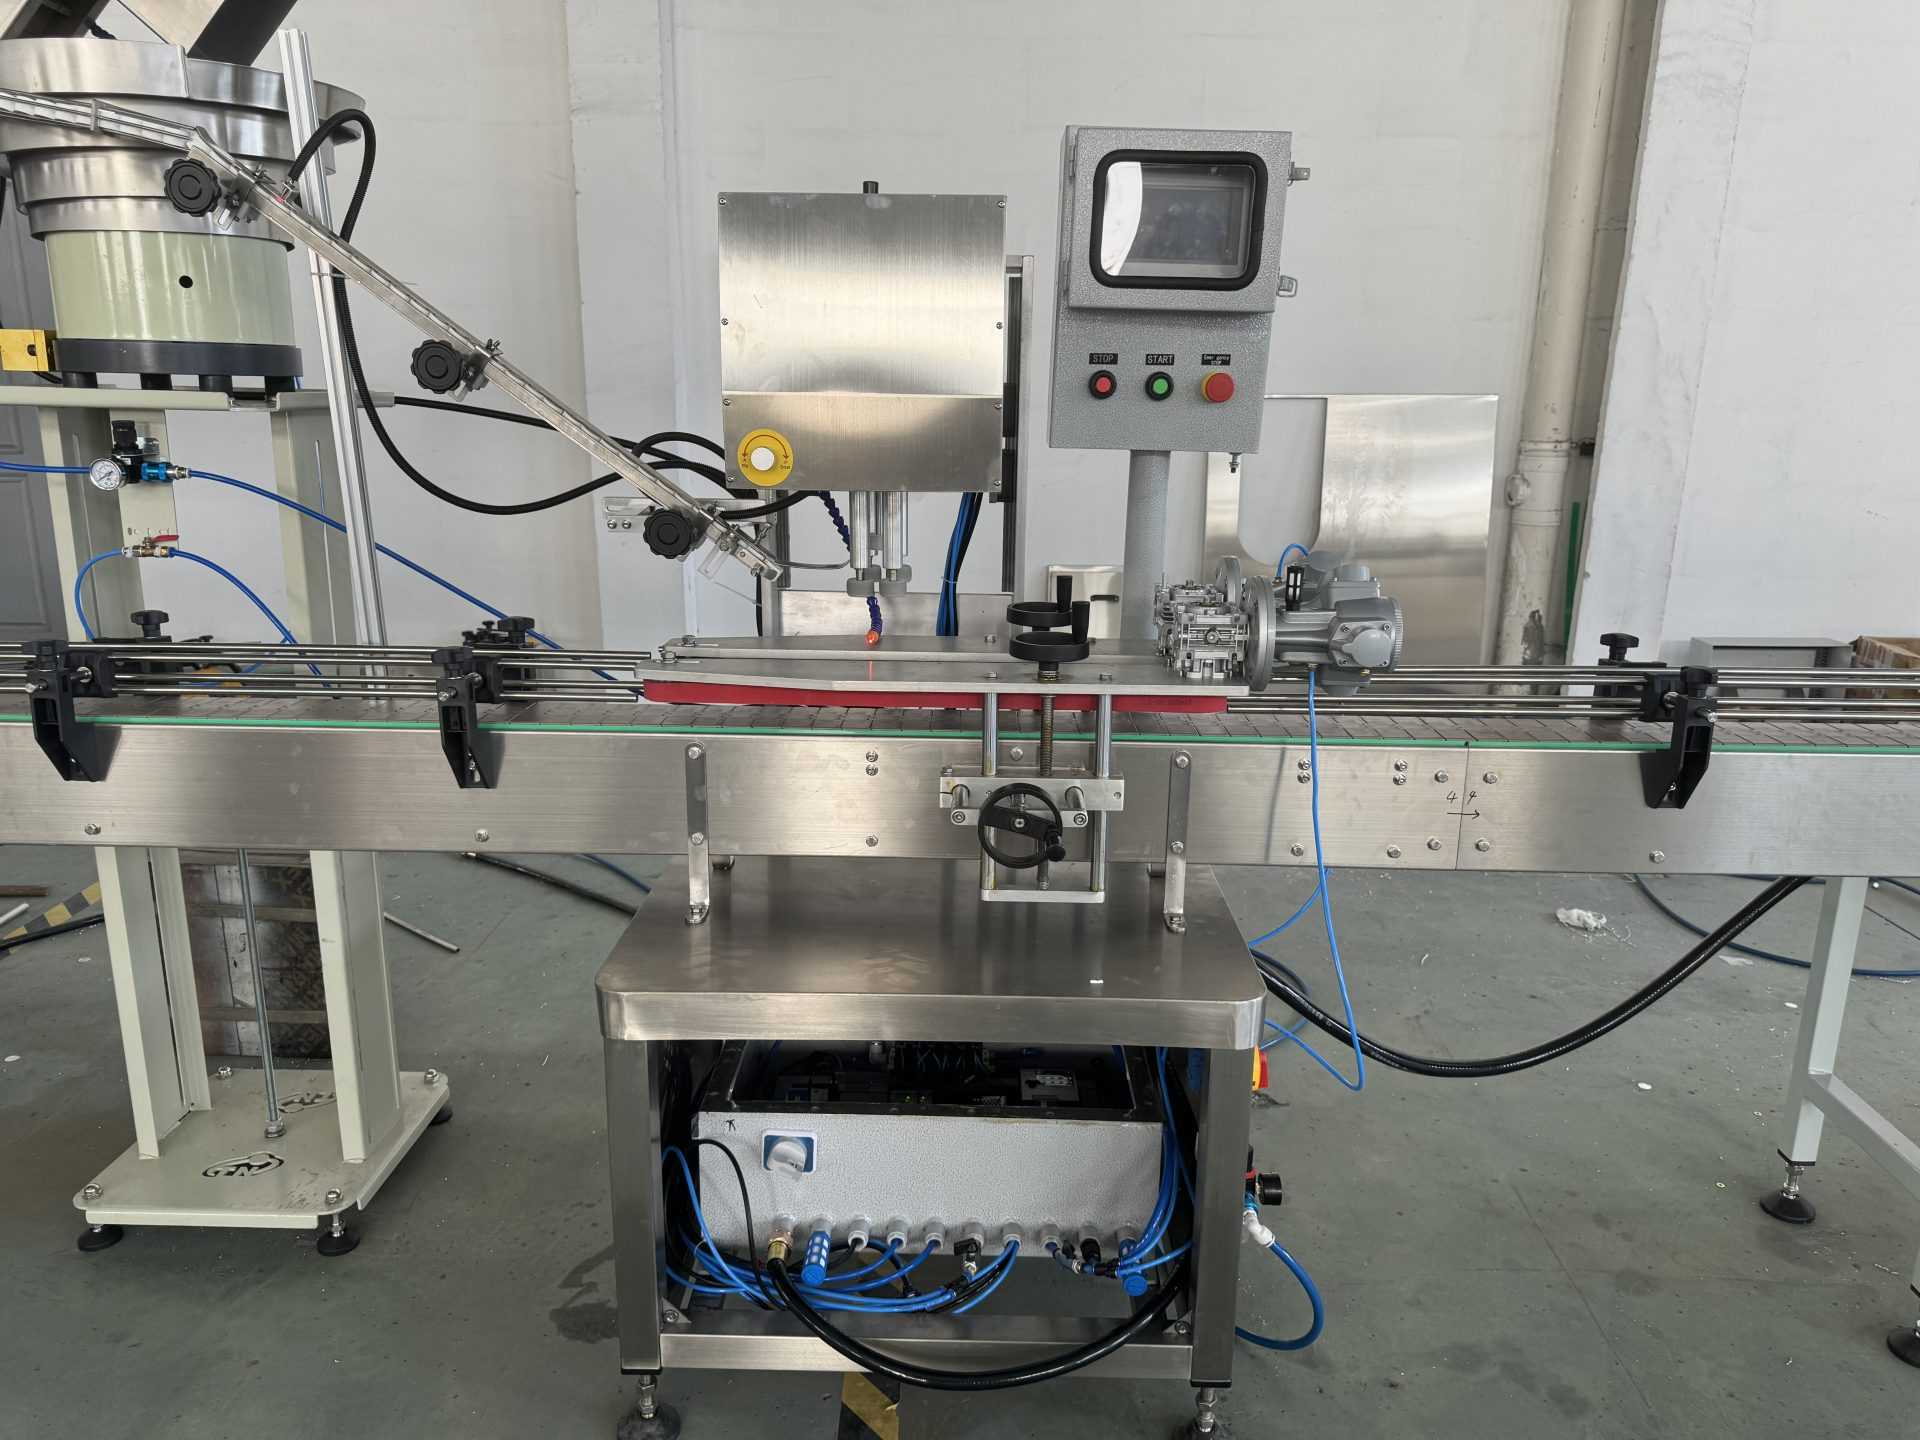
This Runtech four-wheel capping machine view helps connect bottle travel, side control, cap supply, and the tightening station as one continuous handling sequence.
Do Not Treat Every Loose Result as a Tightening Problem
A cap that feels loose often leads directly to a tightening adjustment. Before changing that setting, observe what the bottle did while the closure rotated. Visible container movement suggests that the capping mechanism did not have a stable reaction point.
This distinction is most useful during initial setup. Later production troubleshooting may involve changed package batches, wear, feeding faults, or other causes. The first configuration has a simpler purpose: establish a stable mechanical baseline before normal production begins.
Cap Placement, Thread Start and Alignment for Screw Caps
A closure has to arrive correctly before tightening can finish correctly. With stable placement, the cap reaches the bottle neck in a repeatable position and starts engagement without a sudden tilt. With poor placement, the rest of the cycle may simply force an incorrect start into a tighter incorrect start.
The most revealing moment is often not the bottle leaving the machine. Watch the short interval immediately before the cap touches the neck and through the first rotation. That moment shows whether the closure begins from a controlled position.
Follow the Cap Before It Reaches the Neck
Cap alignment starts upstream. A closure can leave the feeding system in the correct orientation and still become unstable inside a chute, guide, transfer point, or placement mechanism. The complete cap path deserves attention, not only the final tightening area.
Several visual clues are useful during a sample run. Does every cap reach the bottle at a similar height? Does the skirt remain level? Does the neck meet near the centre of the closure, or does one edge contact first? These observations can identify placement problems before the tightening setting is changed.
Treat Thread Start as Its Own Setup Stage
For threaded closures, initial engagement and final tightening are related but different. During the first rotation, the cap needs enough guidance to follow the intended thread path. Only after that engagement becomes repeatable should final tightening become the main adjustment.
Strong tightening cannot correct a closure that has already started at the wrong angle. It can make the result harder to interpret. A cleaner setup sequence confirms cap presentation and thread start first, then tunes the final application condition.
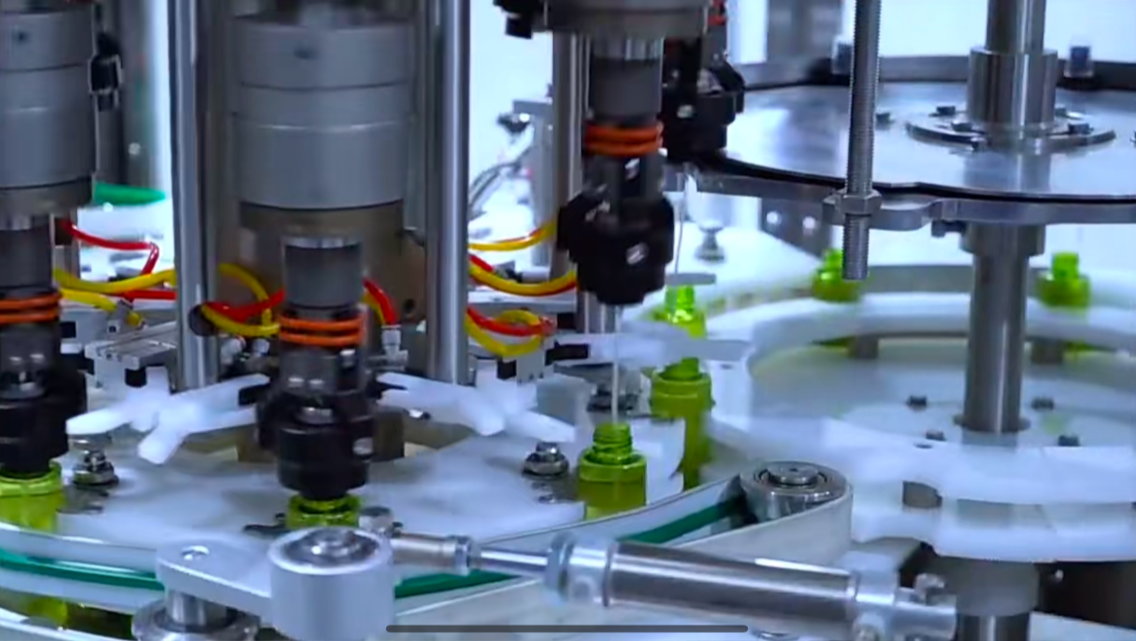
This Runtech capping-station view is useful for separating bottle position, initial cap contact, thread engagement, and final tightening during a screw-cap setup check.
Define Finished Orientation Before the Trial
Some closures only require secure application. Others also need a defined finished direction because the package includes a pump outlet, trigger, dispenser, logo position, or another directional feature. That requirement should be clear before the machine trial begins.
A marked reference bottle or drawing communicates this requirement more clearly than instructions such as “face forward.” It gives the setup team a visible comparison point and reduces different interpretations between production shifts.
Torque Setup: Define the Acceptance Method Before the Number
Once bottle movement is controlled and thread engagement is stable, tightening settings become meaningful. The objective is to reach the required finished closure condition consistently, not simply to make the cap feel as tight as possible.
A universal value should not be copied between unrelated bottle-cap combinations. Thread geometry, closure construction, neck finish, sealing features, material behaviour, and package requirements can all change the appropriate result. Where confirmed closure guidance exists, it should form part of the test plan.
Define How the Finished Package Will Be Accepted
A machine setting is only useful when the team also knows how the finished package will be judged. Where the bottle, closure, liner, seal, or product supplier provides a confirmed application requirement, use that requirement as the starting acceptance reference rather than inventing a generic value.
Before tuning the tightening control, define the inspection method that will be used across consecutive samples. Depending on the package, this may include the specified applied or removal-torque method, seal or leak verification, tamper-feature engagement, opening performance, cap height, or finished orientation. Use the same measuring method and representative package condition throughout the trial so that machine changes can be compared consistently.
Record both sides of the setup:
- Machine condition: holding position, guide position, cap-placement reference, speed or timing where relevant, and tightening setting.
- Package acceptance: the measurement or inspection method used to confirm that the finished closure is acceptable.
Use This Adjustment Order
- Stabilise the bottle. Confirm that the container does not rotate, lean, or visibly deform.
- Confirm cap placement. Check approach, centreline, and initial thread engagement.
- Apply controlled tightening. Use confirmed package requirements when available.
- Inspect consecutive samples. Look for repeatability rather than one ideal bottle.
- Change one variable at a time. Keep cause and effect visible during the trial.
Changing several settings together makes improvement difficult to interpret. Increasing holding pressure while moving the cap guide and changing tightening force may produce a better sample, but the reason for that improvement remains unclear.
Small, controlled changes create a stronger production reference. When a later package batch behaves differently, the original setup can be compared logically instead of rebuilding the process from guesswork.
Watch the Complete Tightening Cycle
A finished package can hide what happened a second earlier. Observe the closure before engagement, during initial rotation, through the tightening zone, and after release. A brief wobble or bottle twist can explain variation that is no longer visible at the discharge conveyor.
This method also makes adjustment less arbitrary. Each observation answers a specific question, allowing holding, alignment, engagement, and tightening to be considered separately.
Use the Failure Pattern to Choose the First Adjustment
The finished rejected bottle does not always identify the first point of failure. Use the earliest visible symptom to decide what to inspect before changing tightening force.
| Observed symptom | Inspect first | First adjustment direction | Do not use first |
|---|---|---|---|
| Bottle turns while the cap rotates | Bottle holding zone, side contact, guide position, bottle rigidity | Restore stable anti-rotation without deforming the bottle | More tightening force |
| Cap is tilted before tightening | Cap chute or transfer, release height, bottle centreline, placement timing | Correct cap presentation before engagement | Higher torque or wheel pressure |
| Cap starts level, then changes angle | First thread turns, neck condition, bottle movement during engagement | Stabilise thread start and bottle position | Forcing the cap tighter |
| Samples vary under the same setting | Bottle and cap variation, feed consistency, intermittent movement | Compare representative parts and the exact cycle where variation begins | Changing several settings together |
| Empty bottles run well but filled bottles do not | Mass, balance, conveyor response, sidewall reaction under holding | Repeat the setup under production-representative filled conditions | Approving the empty-bottle setting unchanged |
Dry Run, Sample Run and Filled-Bottle Run
One successful bottle does not establish production readiness. A staged test is more useful because each stage removes a different type of uncertainty. Begin with mechanical movement, introduce representative packaging components, then reproduce realistic operating conditions.
1. Dry Run: Check Movement and Clearance
Before normal production is considered, inspect guide clearance, bottle entry, cap path, moving contact points, and discharge. Slow observation makes interference easier to see and keeps the first adjustment focused on basic mechanical control.
This check is particularly useful after a format change. A guide positioned slightly too close can disturb every bottle once the conveyor fills, even though the machine appeared acceptable while stationary.
2. Sample Run: Observe Consecutive Bottle-Cap Interactions
Next, run several representative bottles and closures. Repeatability matters more than one visually perfect cycle. Watch how each container enters the holding area and how each cap approaches the neck.
Small differences now become easier to identify. One bottle may rotate, another may lean because of its base, or one closure may arrive lower than the rest. Each pattern points toward a different part of the setup.
3. Filled-Bottle Run: Reproduce Production Behaviour
Empty containers do not always behave like filled ones. Added mass changes inertia, balance, conveyor response, and sometimes the way a flexible sidewall reacts to holding pressure.
Final confirmation should include production-representative filled containers whenever practical. A tall package that seemed stable while empty may react differently after filling. Another format may become easier to control because the additional mass reduces unwanted movement.
Include Stop-and-Restart Behaviour
Packaging lines do not run forever without interruption. Cap replenishment, upstream conditions, inspection, and normal production stops can temporarily change bottle spacing or feeding conditions.
Watch the first packages after a controlled restart. If bottle spacing or cap presentation changes during that short transition, the cause should be understood before the setup is released for routine production.
Compare a Sequence, Not a Single Good Bottle
A single package can look perfect by chance. Consecutive samples are more informative because they show whether cap height, bottle position, thread engagement, and finished closure condition remain stable under the same setup.
An occasional abnormal sample should not be dismissed immediately. It may reveal tolerance sensitivity, intermittent bottle movement, or inconsistent cap presentation. The practical question is what changed during that individual cycle.
Setup Record for Repeat Production
A successful trial loses value when the next production run depends on memory. Guide positions, holding references, cap-placement adjustments, tightening settings, and important observations should be recorded while the validated condition is still clear.
The record does not need to become a long operating manual. Its purpose is simpler: allow a later run to restore the known configuration and verify it instead of rediscovering every position.
A Practical Setup Record Can Include:
- Bottle and closure identification or internal SKU reference.
- Guide and holding positions that materially affect bottle stability.
- Cap-feeding and placement references.
- Tightening setting and the method used to judge the finished package.
- Whether testing used empty or representative filled bottles.
- Required closure orientation, where applicable.
- Useful photographs of validated mechanical positions.
Photographs are helpful when two mechanical positions look similar on paper. They work best when paired with a defined reference such as a scale position, machine mark, or documented adjustment point.
Over time, these records can form a simple changeover matrix. The matrix shows which bottle changes affect holding, which closure changes affect feeding, and which combinations require another tightening trial. This reduces unnecessary adjustment during multi-SKU production.
Keep a Known-Good Reference
A known-good setup gives later production runs a comparison point. If the same recorded machine positions suddenly produce different results, incoming bottles or closures deserve review before several machine settings are changed.
This approach also helps distinguish a changeover error from component variation. Production teams can compare package identity, bottle stability, cap placement, thread start, and tightening in a consistent order.
What to Send Before Final Configuration
Once the internal trial sequence is clear, the same information should be carried into the supplier or final-configuration review. Closure diameter alone cannot define a reliable screw-capping setup; the project brief should connect the real bottle, threaded closure, feeding method, required output, and finished-package acceptance condition.
Physical samples remain the most useful confirmation because they expose bottle holding, cap approach, thread start, surface grip, and package variation under mechanical contact. Drawings are still valuable for neck and thread review, but they should support representative samples rather than replace them.
Submit the Application, Not Only a Machine Request
Representative bottles and closures should form the core of the project information. Where available, neck and thread drawings can clarify intended engagement. When several formats will share one line, each important bottle-cap combination should be identified separately.
Cap feeding also needs a clear definition. Manual placement can isolate the tightening stage during an early test, but it does not validate automatic sorting, transfer, dropping, or placement. The intended feeding method should be included before final configuration.
Prepare These Project Inputs:
- Representative bottle samples from planned production.
- Representative caps or closures for each important format.
- Bottle and closure drawings, when available.
- Known neck or thread information, when available.
- Target production requirement for the complete application.
- Manual or automatic cap-feeding requirement.
- Required finished-cap direction, when orientation matters.
- Expected filled-bottle condition.
- Relevant upstream, conveyor, and downstream interface information.
These inputs make equipment comparison more useful. The discussion can move beyond whether a machine generally accepts a certain cap size and instead examine whether the real bottle remains stable, whether the actual closure can be presented reliably, and whether the finished condition can be repeated.
Where several packages are planned, difficult combinations deserve attention during sample testing. A trial based only on the easiest bottle and closure can create false confidence before routine production changeovers begin.
Turn the First Trial Into a Repeatable Screw-Capping Setup
A stable screw-capping setup starts by watching how the real package moves. Bottle holding creates the reaction point, controlled cap placement supports a clean thread start, and final tightening can then be evaluated with the same finished-package acceptance method across consecutive samples.
Before final configuration, complete three practical actions:
- Measure: record bottle dimensions, neck and closure information, practical gripping areas, and any required finished orientation.
- Compare: run several representative samples and separate holding, placement, thread-start, and tightening observations.
- Test: repeat the setup with the intended cap-feeding method, production-representative filled bottles, and the defined finished-package acceptance check.
Submit actual bottle and cap samples, available thread information, the target production requirement, cap-feeding method, and finished closure direction where applicable. These inputs allow bottle holding, cap placement, thread start, and tightening to be reviewed as one connected automatic screw capping machine setup before the final sample test and configuration are confirmed.
Frequently Asked Questions
Can one capping torque value be used for different bottle and cap combinations?
A universal value should not be assumed. Thread geometry, closure construction, neck finish, liner or sealing features, bottle stability, and package requirements can all change the acceptable finished condition. Use confirmed package guidance where it exists, keep the measurement method consistent, and validate consecutive representative samples instead of copying one number between unrelated formats.
Why can a screw-capping setup work with empty bottles but fail after filling?
Filled containers can change mass, balance, inertia, conveyor response, and the way a flexible sidewall reacts to bottle holding. A tall or lightweight package may therefore behave differently even when every machine setting is unchanged. Final approval should include production-representative filled bottles whenever practical.
What should be sent before an automatic screw capping machine configuration is confirmed?
Send representative bottles and threaded closures, available bottle and neck drawings, known thread information, the intended cap-feeding method, target production requirement, filled-bottle condition, finished orientation if it matters, and the method used to accept the finished package. If several bottle-cap combinations will run on the line, identify the most difficult format as well as the routine format.