

Spray bottle packaging needs more than simple cap tightening. A trigger sprayer has a long dip tube, an offset handle, a nozzle direction, and a threaded closure area. Therefore, the machine must control cap entry, bottle stability, tightening torque, and final sprayer position at the same time.
For cleaning products, disinfectant sprays, glass cleaners, degreasers, garden sprays, and daily chemical liquids, a trigger cap capping machine helps connect filling, capping, and downstream packing into a smoother production flow. However, the best setup should always depend on real bottles, real trigger sprayers, liquid viscosity, target output, and automation level.
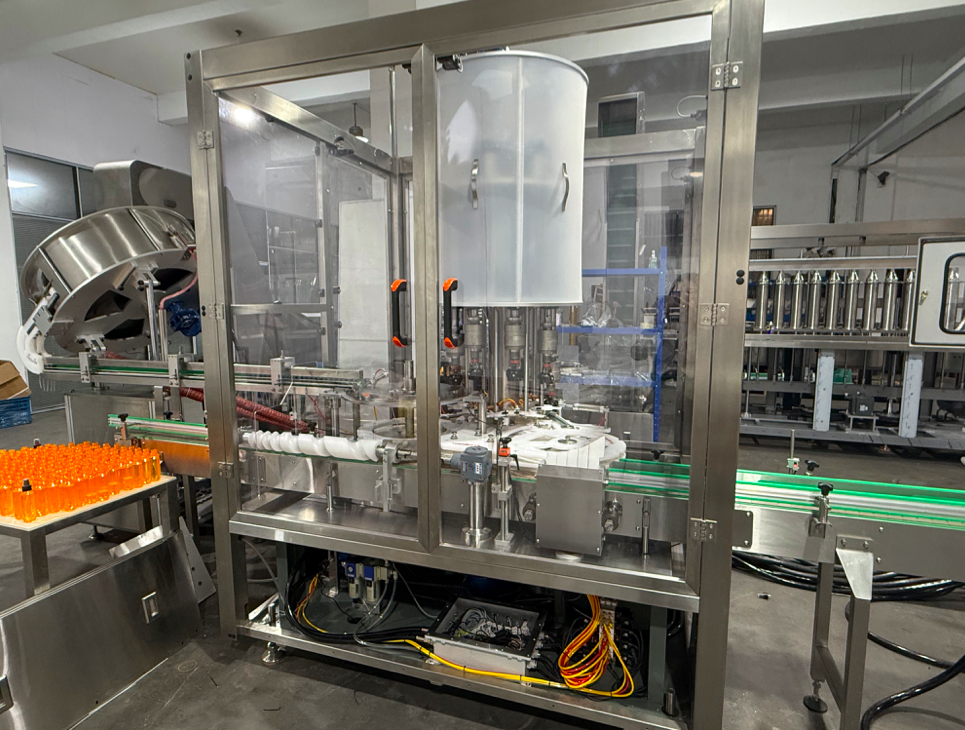
| View Trigger Sprayer Capping Machine | Contact Runtech Capping |
Jump to: What It Is · Applications · Sprayer Positioning · Stability & Torque · Line Layout · Selection Advice · FAQ
What Is a Trigger Cap Capping Machine?
First, this type of machine is designed to tighten trigger sprayer closures onto bottles. These closures are common in household cleaning, hygiene, garden care, automotive care, and daily chemical packaging. Unlike a flat screw cap, a trigger sprayer has a handle, a nozzle, a threaded cap area, and a dip tube.
Because of this structure, the cap is not evenly balanced around the bottle neck. The dip tube must enter the bottle before tightening starts. Meanwhile, the sprayer head must stay aligned so the thread can engage correctly.
In addition, the final nozzle direction may matter. Some spray bottles need the trigger head to face forward for labeling, retail display, carton packing, or tray loading. Therefore, capping quality includes both tightening control and sprayer position control.
A standard bottle capping machine can handle many closure types, but trigger sprayers need a more careful approach. The equipment should match the bottle shape, cap thread, handle clearance, liquid behavior, and planned production speed.
Why trigger caps are different from pump caps
However, trigger caps should not be confused with pump caps. A pump cap usually has a vertical actuator. A trigger sprayer has a horizontal handle and an offset nozzle. As a result, it creates different handling pressure during tightening.
Moreover, a trigger handle can touch guide rails, machine guards, or neighboring bottles if there is not enough clearance. This is especially important in continuous production, where bottle spacing and conveyor movement affect every station.
Therefore, trigger sprayer capping is not only a torque task. It is also a bottle control, tube insertion, cap positioning, and packaging flow task.
Spray Bottle Packaging Applications
In daily chemical production, trigger sprayers are widely used because they make liquid application more controlled. Surface cleaner, bathroom cleaner, kitchen cleaner, glass cleaner, disinfectant spray, fabric refresher, garden spray, and degreaser products often use this bottle format.
Meanwhile, different liquids can affect the filling and capping process. Thin liquids may move quickly inside the bottle. Foaming products may leave bubbles or residue near the neck. Thicker liquids may change bottle weight and transfer behavior after filling.
Therefore, filling equipment, capping equipment, and downstream packing should be planned together. If the filling stage leaves product on the thread, the cap may tighten differently. If bottle transfer is unstable, the sprayer may start at an angle.
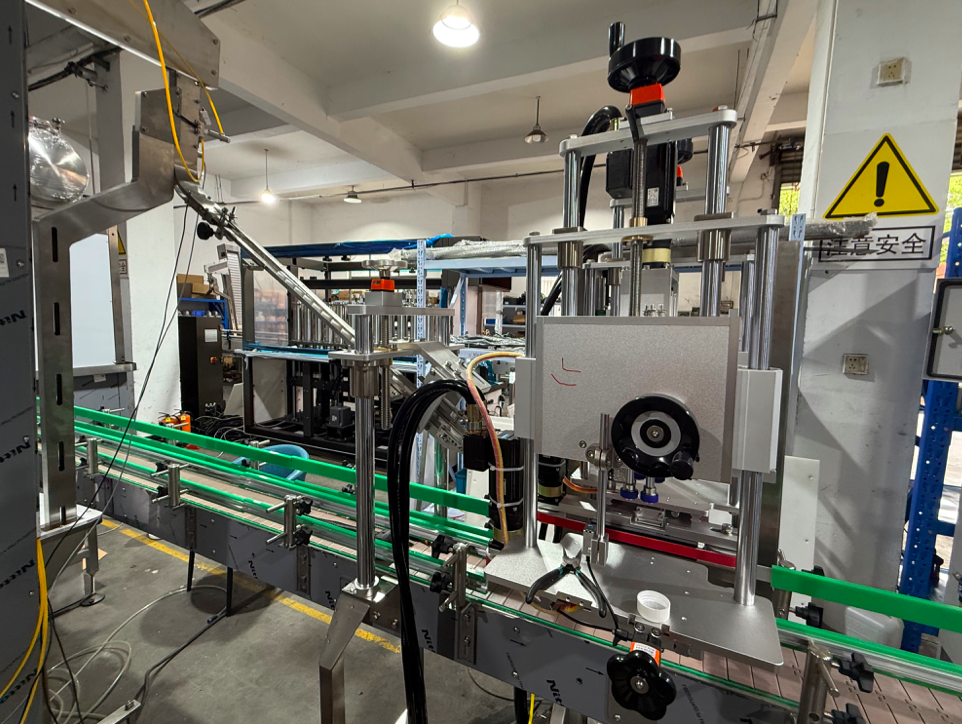
| See Sprayer Cap Equipment | Compare Capping Machine Options |
Cleaning product spray bottles
First, cleaning product bottles often use tall bodies, curved shoulders, or grip-style shapes. These designs help daily use, yet they can make automatic handling more demanding. Therefore, side guides, neck support, and conveyor transfer should match the real bottle.
In addition, the sprayer head is often wider than the bottle neck. If the bottle leans during tightening, the cap may engage at an angle. That can lead to tilted sprayers, uneven cap height, or damaged threads.
However, stronger clamping is not always the answer. Soft plastic bottles can deform under pressure. Therefore, the holding method should keep the bottle steady without squeezing the body or shifting the neck.
Disinfectant spray and hygiene liquids
For disinfectant spray, a neat closure and reliable seal are both important. A tilted sprayer head can affect finished bottle appearance. More importantly, a loose closure may increase leakage risk during storage or transport.
At the same time, disinfectant formulas may vary. Some liquids are alcohol-based, while others use different chemical systems. Therefore, liquid information should guide filling method, contact-part review, and line layout planning.
In practice, real samples give the clearest answer. Bottle material, liquid viscosity, foam behavior, cap thread, and dip tube length all affect the final capping result.
Garden, automotive, and specialty sprays
Besides household cleaning products, trigger sprayers also appear in garden care, automotive cleaning, pet care, and specialty liquid packaging. These products may use stronger bottles, longer dip tubes, or larger sprayer heads.
Moreover, some bottles use irregular shapes for product display. The shape may improve shelf recognition, but it can reduce conveyor stability. Therefore, equipment review should consider both packaging design and mechanical handling.
Trigger Sprayer Positioning and Nozzle Direction
First, sprayer positioning controls how the trigger head sits after tightening. In many spray bottle lines, the nozzle should face a consistent direction. This can support label presentation, carton packing, tray loading, and final inspection.
However, direction control is not only about appearance. The handle can collide with rails or neighboring bottles if it points into the wrong area. In addition, random sprayer direction can create wider bottle spacing and less efficient packing.
Therefore, nozzle direction should be defined before the machine layout is confirmed. If aligned heads are required, capping method, bottle holding, thread design, and downstream packing should be reviewed together.
Dip tube entry before tightening
At the start of the cycle, the dip tube must enter the bottle smoothly. If the tube is too long, too soft, or poorly aligned, it may bend against the bottle wall. Then, the cap can start crooked before the tightening head begins working.
In addition, narrow necks and curved shoulders can make tube insertion harder. The bottle may look simple from the outside, but the inside shape still affects tube behavior. Therefore, tube length and bottle depth should be checked with real samples.
For this reason, cap placement should never be reviewed only from photos. A physical bottle and sprayer set can show whether the tube enters cleanly and whether the cap thread starts correctly.
Orientation after tightening
After the cap catches the thread, the machine must tighten it to a suitable condition. Meanwhile, the trigger head may need to stop at a preferred direction. This balance can be more complex than normal screw cap tightening.
If the process focuses only on direction, cap tightness may not be enough. If the process focuses only on torque, the nozzle may stop randomly. Therefore, the finished bottle requirement should be clear from the start.
In many cases, real samples show whether fixed orientation is practical. Bottle thread tolerance, cap thread tolerance, closure material, and head shape can all affect the final stopping point.
Bottle Stability and Torque Control
First, stable bottle handling is the base of reliable capping. If the bottle leans, turns, or bounces during tightening, torque control becomes less accurate. Therefore, the bottle must stay steady before the capping head applies force.
Meanwhile, torque should match the bottle and closure combination. Too little torque may leave a loose cap. Too much torque may damage threads, deform the sprayer closure, or squeeze a soft bottle body.
However, no single torque value fits every spray bottle. The correct setting depends on bottle material, neck finish, cap thread, closure design, liner structure, liquid type, and packaging purpose. Therefore, sample testing should guide final adjustment.
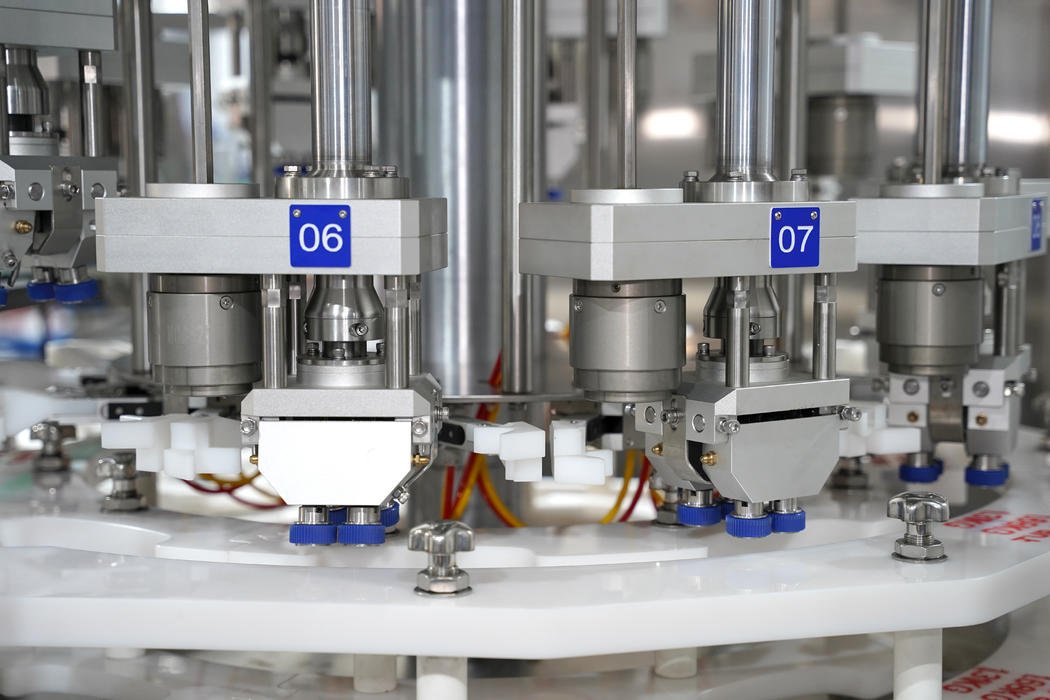
| Check Trigger Cap Tightening Details | Request Line Matching Support |
How bottle shape affects tightening
For example, round bottles may rotate if holding force is too low. Oval bottles may need wider guide support. Grip-style bottles may require special side rail adjustment because the body surface is not symmetrical.
In addition, soft bottles can change shape during gripping. If the holding device presses too hard, the bottle neck may shift slightly. As a result, the cap head may no longer align with the neck center.
Therefore, bottle stability is not only about preventing a fall. It is also about keeping the neck position accurate during cap placement and tightening.
Common tightening issues
Several signs may show poor tightening control. Crooked sprayer heads can suggest weak cap entry or unstable bottle support. Uneven cap height may point to thread engagement issues. Loose caps may show low torque or bottle rotation.
In addition, damaged threads can suggest excessive force or poor alignment. Random nozzle direction may show that orientation control was not included in the equipment plan. Frequent jams may also mean the trigger handle needs more clearance.
Therefore, troubleshooting should begin with the complete bottle and sprayer combination. The bottle, cap, dip tube, guide rails, holding method, and capping head should be checked together.
Filling, Capping, and Packing Line Layout
In a spray bottle production line, capping rarely works alone. Filling comes before it, and labeling or carton packing often follows it. Therefore, the capping system should fit the full packaging flow.
First, the filling stage should match the liquid. Thin cleaners, foaming disinfectants, and viscous daily chemical products may need different filling approaches. Moreover, foam and neck residue can affect the capping stage if they are not controlled.
Next, cap placement should match output needs and closure complexity. Some lines place sprayers manually before automatic tightening. Other lines need automatic cap feeding, sorting, placing, tightening, and discharge handling.
After tightening, bottles may move to labeling, coding, sleeve wrapping, carton loading, or a packing machine. As a result, sprayer direction and bottle spacing can affect the entire downstream process.
Manual placement with automatic tightening
For flexible production, manual sprayer placement with automatic tightening can be practical. This setup avoids a complex cap feeding system when many sprayer styles change frequently. Meanwhile, the tightening action remains more consistent than hand tightening.
However, manual placement still needs good bottle support. If the cap starts at an angle, the machine may tighten a poorly positioned closure. Therefore, operator access, cap start position, and bottle holding should be designed clearly.
Automatic feeding and integrated systems
For more automated lines, the sprayer may need feeding, sorting, tube guidance, placement, and tightening. This approach can reduce manual handling and improve repeatability. However, it also requires consistent caps and more detailed sample review.
In addition, automatic feeding becomes harder when trigger heads have large handles, long tubes, or irregular shapes. Therefore, cap design should be checked before choosing the feeding method.
As an industry reference, PMMI represents packaging and processing machinery fields across filling, capping, closing, and end-of-line equipment. For spray bottle projects, this supports the practical need to review the whole packaging line instead of one station only.
What to Confirm Before Selecting Equipment
First, bottle details should be clear. Important points include bottle height, width, base shape, neck finish, body material, shoulder shape, and stiffness. These details affect guide rails, conveyor transfer, and bottle holding.
Second, sprayer details should include thread type, head shape, handle length, nozzle direction requirement, dip tube length, and cap material. Photos can help, but real samples show how the sprayer behaves during placement.
Third, liquid information should include viscosity, foam level, chemical characteristics, and filling temperature when relevant. These factors affect filling, dripping, bottle cleanliness, and sometimes machine contact parts.
Finally, production planning should define target output and automation level. A small flexible line may not need the same equipment as a stable high-volume line. Therefore, configuration should follow the real process, not a generic machine name.
Sample checklist before inquiry
- First, prepare real bottles with the final neck finish and normal production tolerance.
- Next, prepare matching trigger sprayers with the actual dip tube length.
- Additionally, confirm whether the nozzle must face a fixed direction after tightening.
- Moreover, provide liquid viscosity, foam behavior, and product category.
- Finally, define manual placement, semi-automatic tightening, automatic feeding, or full line integration needs.
Suitable production scenarios
This equipment is suitable for spray bottle packaging lines that need more stable sprayer tightening than manual operation. It is especially relevant for cleaning product lines, disinfectant spray lines, household liquid lines, garden spray lines, and daily chemical bottle packaging.
In addition, it can support production plans that require consistent torque, better cap appearance, improved bottle handling, and smoother connection with filling or packing equipment. However, the exact configuration should be confirmed after sample review.
Therefore, the machine is not selected only by bottle size or cap diameter. The better selection path is to match bottle geometry, closure structure, liquid behavior, output target, and automation plan.
How the Right Setup Improves Packaging Quality
Overall, a suitable setup improves more than cap tightness. It can reduce tilted sprayers, loose closures, bottle shaking, thread damage, and downstream packing problems. Therefore, capping quality supports the whole spray bottle packaging process.
Moreover, consistent sprayer direction improves product appearance. Bottles can enter labeling, coding, and carton packing with cleaner alignment. This is especially helpful when trigger handles are wide or cartons need tight bottle rows.
At the same time, stable torque supports sealing reliability. The cap should close firmly without damaging the sprayer or bottle neck. However, final settings should always be confirmed through real samples and actual production goals.
In short, the right line is not only a machine purchase. It is a match between bottle geometry, sprayer structure, liquid behavior, filling method, capping control, and packaging layout.
Practical Purchasing Advice
For spray bottle projects, the key is not choosing the biggest or most complex machine. Instead, the line should match real samples, real liquid behavior, and real packaging requirements.
- First, confirm bottle stability before discussing tightening speed.
- Second, check dip tube insertion before finalizing cap placement.
- Finally, define nozzle direction before planning labeling or carton packing.
FAQ
What makes trigger sprayer capping different from normal screw cap tightening?
First, a trigger sprayer has an offset handle, nozzle, threaded cap area, and dip tube. A normal screw cap is usually round and compact. Therefore, trigger sprayer capping needs better control over cap entry, bottle holding, handle clearance, and final head direction.
Can one capping machine handle different spray bottle sizes?
In many cases, one system can support several bottle sizes with suitable adjustment. However, bottle height, base shape, neck finish, body stiffness, and sprayer design must be reviewed first. Therefore, real samples are important before final configuration.
Does every spray bottle line need automatic trigger sprayer feeding?
Not always. Manual sprayer placement with automatic tightening can fit flexible production or frequent closure changes. Meanwhile, automatic feeding may suit more stable formats and higher output goals. The correct choice depends on cap shape, consistency, output target, and automation level.
Why does nozzle direction matter after capping?
Nozzle direction can affect shelf appearance, label alignment, carton packing, and bottle spacing. In addition, a trigger handle may collide with rails or nearby bottles if it points the wrong way. Therefore, direction requirements should be defined before equipment design.
What information helps confirm the right filling and capping setup?
First, real bottle and trigger sprayer samples are needed. In addition, liquid viscosity, foam behavior, product type, target output, cap direction requirement, and automation level should be provided. These details help confirm a suitable filling, capping, and packaging solution.
Related Reading
| Trigger Cap / Dispenser Cap Tightening Machine
Review the related sprayer cap tightening equipment for trigger caps, dispenser caps, and directional nozzle applications. |
Rotary Type Capping Machine Options
Compare rotary capping machine choices for different bottle caps, closure styles, line speeds, and automation plans. |
Runtech Capping Packaging Equipment
Explore filling, capping, and packaging equipment support for liquid products, spray bottles, and daily chemical lines. |
Confirm a Spray Bottle Filling and Capping Solution
To confirm a suitable line, Runtech Capping can review product type, liquid viscosity, bottle style, trigger sprayer design, target output, and automation requirement. Therefore, the proposed filling, capping, and packaging solution can match the real production process instead of a generic machine layout.
For spray bottles with long dip tubes, directional nozzles, soft plastic bodies, or downstream carton packing requirements, early sample review is especially useful. In addition, bottle drawings and cap samples can help confirm guide rails, holding method, capping head design, and line layout.
| View Sprayer Capping Equipment | Contact Runtech Capping |