
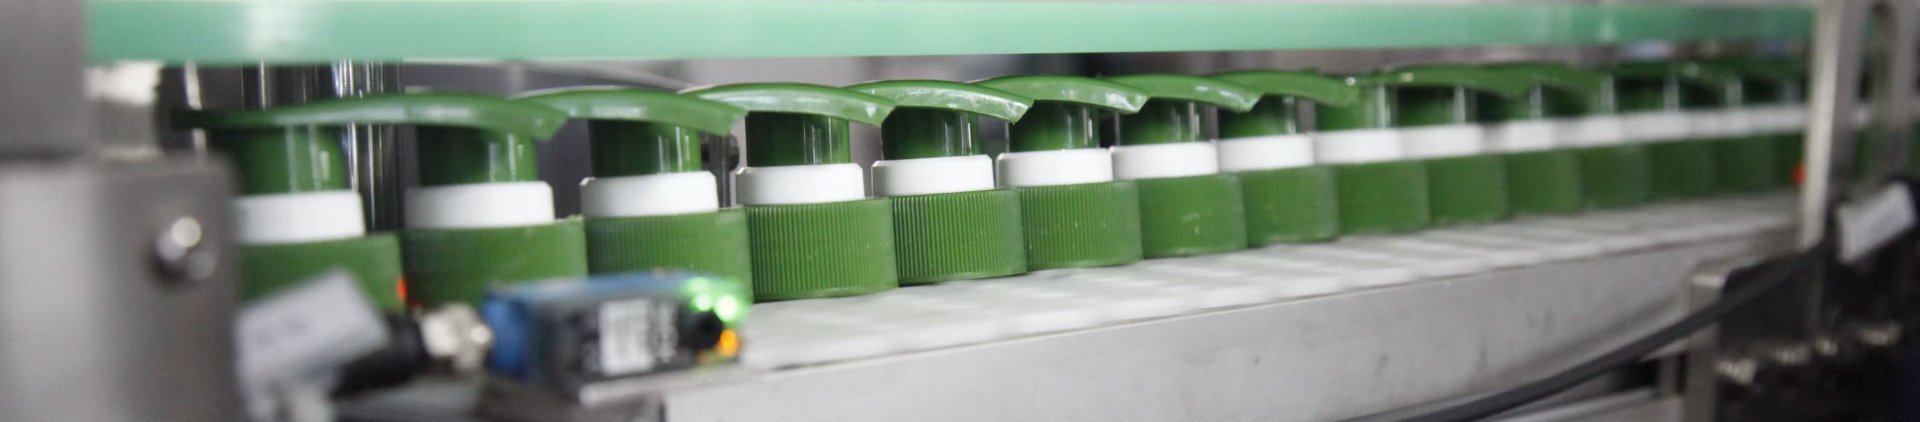
A few bottles leave the line slightly low. The next group looks normal, then one filling position begins drifting again. On an automatic filling machine, that pattern does not automatically mean the filling value needs adjustment. Product supply, flow behavior, metering movement, nozzle cut-off, container variation, or an incorrect recipe can create very similar symptoms. The fastest route to a useful diagnosis is to define the error pattern first and change settings only after the evidence points toward a specific cause.
Diagnostic principle: a low or high bottle is a symptom, not a diagnosis. Record where the deviation occurs, when it occurs, and whether several filling heads move together before changing calibration or individual corrections.
Define the Error Pattern Before Adjusting Anything
When dosage variation appears during production, the control screen can seem like the obvious place to start. However, changing a value immediately removes part of the evidence. A more useful first step is to collect consecutive bottles in production order and identify what the deviation actually looks like.
Imagine a line running with several filling positions. If one position repeatedly produces low results while the others remain stable, a common product-supply problem becomes less likely. By contrast, when every position moves lower at roughly the same time, a shared condition deserves attention before individual corrections are changed.
Look at the shape of the variation
The pattern often says more than one isolated measurement. A slow downward drift suggests a different investigation from occasional sharp low fills. Likewise, a stable but consistently offset result is different from a process that jumps above and below the target.
Separate these patterns before troubleshooting:
- One filling position stays low or high: compare that position with a stable neighboring head.
- All positions move together: inspect shared supply, product, recipe, and process conditions.
- Results slowly drift: record product condition, supply level, run time, and temperature where relevant.
- Start-up bottles differ: investigate priming, trapped air, settling, and the condition after stopping.
- Only occasional bottles are abnormal: look for intermittent air entry, sensing, valve, or cut-off behavior.
- Visible liquid levels vary but measured quantity remains stable: investigate the bottle and measurement method first.
Timing adds another useful clue. Bottles produced immediately after start-up should not automatically be mixed with samples from steady running. Similarly, the first containers after a pause may represent a different product-path condition from containers produced after several stable cycles.
The measurement itself must also be defined. A visible liquid line, gross bottle weight, net product weight, and calculated volume answer different questions. Once that distinction is clear, filling troubleshooting becomes much more precise.
Cause 1–2: Product Supply and Flow Stability
The metering section cannot repeat a dose reliably if product reaches it under changing conditions. Therefore, product supply belongs near the beginning of the diagnostic sequence, even when the filling heads appear to move normally.
Cause 1: Product supply changes between filling cycles
A line can appear stable while the inlet condition changes quietly in the background. Product level drops, a transfer arrangement cycles differently, a hose draws air, or replenishment disturbs the material entering the filler. As a result, each metering cycle may not begin from the same product condition.
The strongest clue is usually repetition. If several filling heads move low together around the same supply event, that relationship should be recorded before individual adjustments are touched. On the other hand, one unstable head pushes the investigation toward its local hose, connection, valve, metering path, or nozzle.
What to watch during the next run
- Does the deviation appear as the product supply level falls?
- Do visible bubbles appear before a short fill?
- Does replenishment coincide with a temporary dosage change?
- Do several filling positions shift together?
- Does stable performance return after the product path is fully primed?
This approach avoids a common troubleshooting trap. Increasing a filling correction can temporarily compensate for a low result caused by unstable supply. Later, once supply returns to normal, the same correction may produce a high fill instead.
Cause 2: Product behavior changes while the line runs
The same formulation does not always behave identically throughout a production shift. Temperature can change, foam can build, trapped air can enter the product path, or a viscous material can refill differently from a free-flowing liquid.
A typical example appears when early production looks stable but variation grows later. If product condition changes at the same time, moving the target dose may only hide the trend. Instead, the measurement record should note the condition of the product beside the fill result.
Foam creates another practical problem. A bottle can look high immediately after filling and then settle noticeably. Therefore, a visual level check should not be treated automatically as proof that actual net quantity has changed.
Flow resistance also matters. A thicker product may take longer to refill part of a metering path, while a thinner liquid may behave differently during shut-off. The relevant question is not whether one formulation is “difficult,” but whether its behavior remains sufficiently repeatable throughout the filling cycle.
Cause 3–4: Metering, Drive and Sensor Reference Issues
Once product supply appears stable, the investigation can move closer to the dosing mechanism. At this stage, the main question changes: does the physical metering action return to the same condition for each cycle?
Cause 3: The metering action does not repeat consistently
Different filler designs create dosage in different ways. Therefore, generic adjustment advice can be misleading. A piston-based system, pump-based arrangement, weighing process, and flow-meter system do not use the same physical reference.
A stable value on the screen also does not prove that every mechanical or product-contact element repeats perfectly. A local leak, incomplete refill, valve behavior, loose connection, trapped air, or inconsistent movement can alter delivered quantity while the recipe itself remains unchanged.
When one position behaves differently, direct comparison is usually more useful than compensation. A stable neighboring head provides a working reference under the same product, bottle, recipe, and line conditions. Differences then become easier to see.
For a one-head problem, compare rather than compensate:
- hose routing and visible air;
- metering movement and refill behavior;
- valve opening and closing sequence;
- nozzle start and shut-off;
- visible leakage or product residue;
- individual correction values and recent adjustments.
This comparison keeps the original symptom visible. If the low head immediately receives a larger correction, its output may look better while the physical cause remains. The next changeover or product condition can then bring the same problem back.
Cause 4: A sensor or reference changes the filling sequence
Some dosage problems begin before product leaves the nozzle. A bottle arrives slightly out of position, a detection signal becomes intermittent, or a reference state is not reached in the same way. Consequently, filling may begin under different physical conditions even though the commanded dose has not changed.
Bottle detection provides a useful example. It does not necessarily measure dose, yet inconsistent detection can change positioning or sequence timing. Bottle transparency, residue on a sensing surface, vibration, alignment, or connection condition can all deserve inspection when the symptom is intermittent.
The observation before the abnormal fill is particularly valuable. Does the bottle stop in the same place? Does nozzle motion reach the same position? Does the error follow one container format or one filling lane? These details are more useful than moving a sensor until the line appears normal again.
Where controlled drive movement and recipe repeatability are central to a project, the servo type filling machine category provides a relevant equipment direction. However, drive control remains only one part of the complete filling process, so product behavior and mechanical conditions still need to be considered.
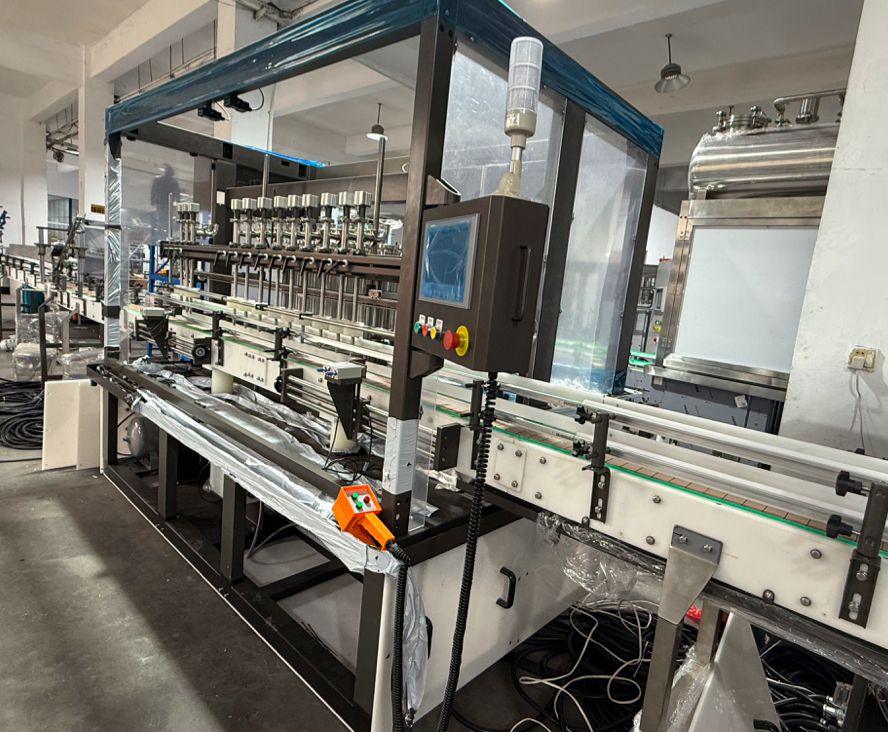
A full equipment view helps compare filling positions, bottle movement and the common product path before an individual setting is changed.
Cause 5: Nozzle Cut-Off and Residual Product
Not every quantity difference develops during the main metering movement. Sometimes the decisive moment occurs at the end of the fill, when product should stop cleanly but a small amount continues to move.
On a busy line, that final moment is easy to miss. The conveyor advances quickly and the next bottle arrives. A low-viscosity liquid may leave one extra drop, while a thicker formulation may create a short string between the nozzle and container.
Therefore, nozzle behavior should be watched through the complete cycle. Delayed shut-off, dripping, retained material, residue around the outlet, or inconsistent withdrawal can create a measurable difference even when the main metering movement looks repeatable.
Use video to slow down a fast event
A short video can reveal more than another round of random setting changes. The useful view includes both the nozzle tip and bottle opening, preferably with a stable filling position visible for comparison.
During playback, watch for dripping, stringing, splashing, delayed closing, irregular nozzle lift, or product left around the outlet. Meanwhile, note where the residual product goes. Material entering the current bottle creates a different problem from material lost outside the container.
Practical check: keep the recipe unchanged, address visible nozzle residue where appropriate, and repeat the same consecutive sample test. If the variation changes, record the result before another variable is introduced.
A temporary improvement still needs interpretation. Cleaning may remove a symptom without explaining why residue formed. For that reason, the next observation should determine whether the condition stays stable through continued production.
Cause 6: Bottle Variation and Measurement Method
Two containers can hold similar quantities and still show visibly different liquid levels. Bottle geometry, wall movement, shoulder shape, base form, and internal cross-section all influence what appears on the line.
This becomes especially noticeable when the liquid level sits inside a narrow section. A small internal shape difference can create a more obvious level change. Similarly, a flexible container can deform during handling without any change in the actual quantity inside.
For that reason, visible fill height and dosage variation should be treated as separate questions. First determine whether the concern is appearance, measured net quantity, or both. Then keep the same measurement method throughout the trial.
Do not let the measurement method create a machine problem
Gross bottle weight can be misleading when empty container weights vary. In that situation, packaging variation becomes mixed with product quantity. A defined tare method makes the comparison more useful.
Measurement conditions matter as well. A scale used beside vibration, placed on an unstable surface, or read inconsistently can make the process appear worse than it is. Foam and settling add another variable because samples checked at different times may not be directly comparable.
Before changing filling settings, confirm:
- the same measurement method is used for every sample;
- the measuring device is used under stable conditions;
- tare handling remains consistent where weight is used;
- foam and settling time are controlled;
- container deformation or unstable bases are recorded;
- visible level differences are separated from measured quantity differences.
Packaging can also affect the filling event directly. An unstable bottle may enter off-center, tilt, or shift underneath the nozzle. In that case, container variation is no longer only an inspection issue; it becomes part of the filling process itself.
This distinction prevents unnecessary correction. If measured quantity remains stable but appearance changes with bottle geometry, adjusting dosage may turn a stable process into a real overfill or underfill problem.
Cause 7: Recipe, Changeover or Calibration Error
When variation appears immediately after a bottle, product, or SKU change, the changeover record becomes one of the most useful diagnostic tools. Several small changes can happen even when the production record still shows a familiar recipe name.
For example, an individual correction may have been changed during a previous trial. A nozzle position can move during cleaning, or a product path may not be fully primed after reassembly. Meanwhile, a copied recipe can retain an adjustment that made sense for another product.
Compare the current run with the last stable condition
Recipe names alone are not enough. Instead, compare the relevant filling values, physical setup, nozzle positions, product path, bottle handling, and recent change history with the last run that produced stable results.
This comparison becomes particularly useful when one SKU runs consistently while another does not. The product itself may be responsible, but a format-specific setup difference can create the same symptom. Preserving a stable reference therefore reduces repeated trial-and-error work.
Review these points after a changeover:
- correct recipe selected;
- intended filling quantity confirmed;
- individual head corrections reviewed;
- product path fully primed;
- nozzle positions restored;
- removed hoses or valves reassembled correctly;
- bottle positioning checked;
- verification samples collected before normal production resumes.
Know when calibration is actually the next step
Calibration is valuable when the process repeats consistently but remains offset from the intended result. However, it is a weak first response when consecutive measurements scatter unpredictably above and below the target.
The distinction is straightforward. Closely grouped results that remain shifted in one direction may justify a reference review. By contrast, wide cycle-to-cycle spread points toward a repeatability problem that calibration alone cannot remove.
Calibration conditions also need stability. Air in the product path, changing foam, inconsistent supply, or a weak measurement method can create a correction that appears successful for several bottles and becomes wrong once the process settles.
For this reason, filling calibration works best after the original process pattern is understood. The objective is not to make one bottle land on the target. It is to create a condition that can be reproduced across repeated cycles.
Troubleshooting Order and Trial Record
A good troubleshooting sequence removes uncertainty one layer at a time. Measurement comes first because there is little value in adjusting equipment to correct a problem created by bottle geometry or inconsistent weighing.
The next decision is whether the fault is shared or local. This single step prevents a common waste of time: individually adjusting several filling positions when the real change sits in the common product supply or recipe.
Recommended diagnostic order
- Confirm the measurement. Determine whether the difference is measured quantity or only visual fill level.
- Collect consecutive samples. Keep bottle order instead of selecting only obvious high and low examples.
- Identify the filling position. Separate a local deviation from a common shift.
- Check product supply. Look for air, starvation, replenishment effects, or changing inlet conditions.
- Record product behavior. Note foam, flow changes, settling, or temperature trends where relevant.
- Compare metering behavior. Use a stable position as a reference where possible.
- Observe sensing and positioning. Confirm that the filling sequence begins from a repeatable physical condition.
- Watch nozzle cut-off. Look for dripping, stringing, residue, or delayed shut-off.
- Review the changeover. Compare current settings and setup with the last stable run.
- Review calibration last. Change the reference only after the process is stable enough for the result to be meaningful.
A trial record prevents circular troubleshooting
Without a record, several adjustments can happen almost together. A nozzle gets cleaned, supply is replenished, one correction value changes, and the line suddenly looks better. However, no evidence remains to show which action actually affected the result.
Instead, capture the original condition first. Then change one relevant variable where practical and repeat the same sampling method. Even when the final root cause still needs confirmation, the trial produces information that can guide the next step.
- product or formulation reference;
- bottle format and packaging batch where available;
- intended filling quantity;
- sample sequence number;
- filling-head position;
- measured result and measurement method;
- product and supply condition;
- recipe or changeover reference;
- the exact adjustment made during the trial;
- result after the adjustment.
Descriptions should remain factual. “Head 4 dripped after shut-off” is stronger than “Head 4 is faulty.” Likewise, “all positions moved lower as supply level fell” preserves an observation without assigning a root cause too early.
Video can strengthen that record. A useful clip shows bottle position, nozzle movement, product discharge, and shut-off together rather than an isolated close-up. When possible, a normal cycle and an abnormal cycle should be recorded from the same angle.
Read the sequence, not only the average
An acceptable average can hide an unstable process. Alternating high and low bottles may average close to the intended result while individual fills remain inconsistent. Therefore, sequence and spread matter during diagnosis.
A gradual decline tells a different story from random outliers. Meanwhile, repeated low results from one filling position point in another direction again. Keeping samples in production order preserves those clues.
After a controlled correction, repeat the same test. One acceptable bottle proves only that one cycle worked. A repeated pattern under comparable conditions provides much stronger evidence that the process has actually changed.
Use the Symptom to Choose the Next Check
Once the basic data is available, the next action should follow the symptom rather than a fixed list of adjustments. This makes filling troubleshooting faster because unlikely causes can be deprioritized without being ignored completely.
A practical decision map:
- All heads gradually move low: inspect common supply and changing product conditions before individual settings.
- One head stays consistently different: compare the local product path, valve, metering action, nozzle, and correction value.
- Variation appears only after stopping: compare priming, trapped air, settling, and restart sequence.
- Visible level varies but net measurement is stable: review bottle geometry and measurement timing.
- Variation starts after changeover: compare the current setup with the last stable recipe and physical configuration.
- Results are tightly grouped but consistently offset: review calibration after confirming process stability.
This decision logic also makes technical communication clearer. Instead of reporting only “fill accuracy is unstable,” the production record can state that several positions drifted together after a supply change, or that one nozzle repeatedly produced low measurements while neighboring positions remained stable.
Those descriptions lead to testable questions. More importantly, they prevent a technical review from beginning with an unsupported promise about what accuracy should be achievable.
Three Actions Before the Next Adjustment
Inconsistent fill volume becomes easier to diagnose once it is treated as a process pattern rather than a single setting problem. The key is to preserve the evidence long enough to distinguish supply, product behavior, metering, sensing, nozzle, container, and recipe effects.
Before the next trial, three actions create the strongest starting point:
- Measure: collect a consecutive sample sequence and keep each bottle linked to its filling position.
- Compare: record the difference between the abnormal cycle and the last stable production condition.
- Test: change one relevant condition where practical, then repeat the same measurement method before changing anything else.
What to Submit for an Automatic Filling Machine Accuracy Review
A useful technical inquiry should include consecutive measured results, the product or formulation, bottle format, intended filling quantity, affected filling positions, and the condition in which the deviation appears. In addition, an abnormal-cycle video and the most recent recipe or changeover record can help separate a product, setup, metering, or nozzle issue.
These materials provide a factual basis for reviewing the filling path and deciding what should be measured, compared, or tested next. No accuracy result should be assumed until the actual product, bottle, equipment configuration, and test conditions have been confirmed.
| Submit Fill Variation Data → | Review Linear Filling Equipment → |
Frequently Asked Questions
Why can fill volume vary even when all displayed settings remain unchanged?
Displayed settings describe the commanded setup, but the physical process also depends on product supply, trapped air, flow behavior, metering condition, sensing, bottle position, and nozzle shut-off. Therefore, unchanged screen values do not prove that every production condition remained the same.
How many bottles should be checked during filling troubleshooting?
There is no universal sample count that fits every product, filling quantity, process, and quality requirement. However, one isolated bottle is rarely enough to reveal a useful pattern. A consecutive sequence should be used to show drift, clustering, intermittent variation, or a repeated filling-position difference, while final acceptance follows the site’s own quality procedure.
Can bottle variation make a stable filling process look inaccurate?
Yes. Internal geometry, bottle deformation, base shape, wall movement, and empty-container weight can change visible fill level or gross measurement. As a result, bottle variation and the measurement method should be checked before changing the filler.
When should filling calibration be reviewed again?
Calibration deserves review after measurement and process conditions are stable, particularly when consecutive results remain closely grouped but consistently offset. Widely scattered results usually call for a repeatability investigation before another calibration correction is applied.
What information is most useful for remote fill-volume troubleshooting?
The strongest starting package includes consecutive measurements, sample order, filling-head position, product information, bottle format, intended quantity, recipe or changeover reference, and a video showing the abnormal filling cycle. A normal-cycle comparison is also useful when available.